This isn’t a tech-related post, so if you’re only here for the tech, feel free to skip over.
Any of y’all hate spiders? If you had asked me that last week, I would have said “no”. Turns out you just need to get in a fight with the wrong spider to change that. I’m in the central United States, so thankfully I don’t have to deal with the horror spiders places like Australia have. But even in my not-intrinsically-hostile-to-human-life area of the world, we have some horror spiders of our own turns out. The two most common ones (the Brown Recluse and Black Widow) are basically memes at this point because they get mentioned so often; I’ve been bitten by both so far. The Brown Recluse bite wasn’t really that dramatic before, during, or after treatment, so there’s not really a story to tell there. The Black Widow bite on the other hand… oh boy. Holy moly.
I woke up last Saturday since the alternative was to sleep for 24 hours straight and that sounded awful. There’s lots of good things to do with a Sabbath, why waste the day on sleep? Usually I spend (or at least am supposed to spend) this day with my family, generally doing Bible study and board games. Over the last few weeks though, I had been using the time to clean up various areas of the house that needed it, and this time I decided to clean up a room that had been flooded some time back. I entered the Room of Despair, with the Sword of Paper Towels in one hand and the Shield of Trash Bags in the other. In front of me stood the vast armies of UghYuck-Hai. (LotR fans will get the joke.) Convinced that I was effectively invulnerable to anything the hoards could do to me, I entered the fray, and thus was the battle joined in the land of MyHome.
Fast forward two hours of sorting, scrubbing, and hauling. I had made a pretty decent dent in the mess. I was also pretty tired at that point, and our family’s dog needed me to take him outside, so I decided it was time to take a break. I put the leash on the dog, and headed into the great outdoors for a much-needed breath of fresh air.
It was at about that time I realized there was something that felt weird on my left hip. In my neck of the woods, we have to deal with pretty extreme concentrations of mosquitoes, so I figured I probably just had some of my blood repurposed by a flying mini-vampire. Upon closer inspection though, I didn’t see localized swelling indicating a mosquito bite (or any other bite for that matter). The troubled area was just far enough toward my back that I couldn’t see if it had a bite hole or not, and I didn’t notice any kind of discoloration to give me a heads-up either. All I knew is that there was a decent-sized patch of my left hip that HURT if I poked it lightly. I’d previously had random areas of my body hurt when poked (probably from minor bruises), so I just lumped this event in with the rest of the mystery injuries I’ve been through and went on with my day.
Upon coming back from helping the dog out, I still felt pretty winded. I chalked that up to doing strenuous work in an area with bad air for too long, and decided to spend some time in bed to recover. One hour in bed turned into two. Two turned into three. Regardless of how long I laid there, I still just felt exhausted. “Did I really work that hard?”, I wondered. It didn’t seem like I had done enough work to warrant this level of tiredness. Thankfully I did get to chat with my mom about Bible stuff for a good portion of that time, so I thought the day had been pretty successful nonetheless.
The sun went down. I was still unreasonably tired. Usually this was when me and my mom would play a board game together, but I just wasn’t up for it. I ended up needing to use the restroom, so I went to do that, and that’s when I noticed my now-even-sorer hip wasn’t the only thing that was wrong.
While in the restroom, I felt like my digestive system was starting to get sick. This too was pretty easily explainable, I had just worked in filth and probably got exposed to too much yuck for my system to handle. My temperature was a bit higher than normal. Whatever, not like I hadn’t had fevers before. My head felt sore and stuffed up, which again just felt like I was getting sick in general. My vision also wasn’t great, but for all I know that could have just been because I was focusing more on feeling bad and less on the wall of the bathroom I was looking at. At this point, I didn’t think that the sore hip and the sudden onset fever might be related.
After coming out of the bathroom, I huddled in bed to try to help the minor fever burn out whatever crud I had gotten into. My mom came to help take care of me while I was sick. To my surprise, the fever didn’t stay minor for long - I suddenly started shivering like crazy even though I wasn’t even remotely cold. My temperature skyrocketed, getting to the point where I was worried it could be dangerously high. I started aching all over and my muscles felt like they got a lot weaker. My heart started pounding furiously, and I felt short of breath. We always keep colloidal silver in the house since it helps with immunity, so my mom gave me some sprays of it and had me hold it under my tongue. I noticed I was salivating a bunch for absolutely no reason while trying to hold the silver spray there as long as I could. Things weren’t really improving, and I noticed my hip was starting to hurt more. I mentioned the sore hip issue to my mom, and we chose to put some aloe vera lotion and colloidal silver on it, just in case I had been bitten by a spider of some sort.
That turned out to be a very good, very very VERY painful idea. After rubbing in the lotion, the bitten area started experiencing severe, relentless stabbing pains, gradually growing in intensity as time progressed. For the first few minutes, I was thinking “wow, this really hurts, what in the world bit me?”, but that pretty quickly gave way to “AAAAA! AAAAA! AAAAAAAAAAAAAA!” I kept most of the screaming in my mind, but after a while it got so bad I just rocked back and forth and groaned for what felt like forever. I’d never had pain like this just keep going and going, so I thought if I just toughed it out for long enough it would eventually go away. This thing didn’t seem to work like that though. After who-knows-how-long, I finally realized this wasn’t going to go away on its own, and so, for reasons only my pain-deranged mind could understand, I tried rolling over on my left side to see if squishing the area would get it to shut up. Beyond all logic, that actually seemed to work, so I just stayed there for quite some time.
At this point, my mom realized the sore hip and the rest of my sickness might be related (I never managed to put the two together). The symptoms I had originally looked like scarlet fever plus random weirdness, but they turned out to match extremely well with the symptoms of a black widow bite (I didn’t have the sweating yet but that ended up happening too). The bite area also started looking discolored, so something was definitely not right. At about this point my kidneys started hurting pretty badly, not as badly as the bite but not too far from it.
I’ll try to go over the rest of the mess relatively quickly. In summary:
I passed out and fell over while trying to walk back from the restroom at one point. From what I remember, I had started blacking out while in the restroom, realized I needed to get back to bed ASAP, managed to clumsily walk out of the bathroom and most of the way into the bed, then felt myself fall, bump into a lamp, and land on the bed back-first (which was weird, my back wasn’t facing the bed yet). My mom on the other hand, who was not virtually unconscious, reports that I came around the corner, proceeded to fall face first into the lamp with arms outstretched like a zombie, had a minor seizure, and she had to pull me off the lamp and flip me around. All I can think is my brain must have still been active but lost all sensory input and motor control.
I couldn’t get out of bed for over 48 hours straight thereafter. I’d start blacking out if I tried to stand up for very long.
A dime-sized area around the bite turned purple, then black. So, great, I guess I can now say a part of me is dead :P At this point we were also able to clearly see dual fang marks, confirming that this was indeed a spider bite.
I ended up drinking way more water than usual. I usually only drink three or four cups a day, but I drank more like nine or ten cups the day after the bite.
I had some muscle paralysis that made it difficult to urinate. Thankfully that went away after a day.
My vision got very, very blurry, and my eyes had tons of pus coming out of them for no apparent reason. This was more of an annoyance than anything, I was keeping my eyes shut most of the time anyway, but the crud kept drying and gluing my eyes shut! It was easy enough to just pick off when that happened, but it was one of those things that makes you go “come on, really?”
On the third day of recovery, my whole body broke out in a rash that looked like a bunch of purple freckles. They didn’t hurt, didn’t bump up, didn’t even hardly itch, but they looked really weird. Patches of the rash proceeded to go away and come back every so often, which they’re still doing now.
I ended up missing three days of work while laid up.
We kept applying peppermint oil infused aloe vera lotion and colloidal silver to the bite, which helped reduce pain (well, except for the first time anyway :P) and seems to have helped keep the toxins from spreading too much.
A couple of questions come to mind at this point. For one, how do I know that it was a black widow that bit me? Unfortunately, I never saw or felt the spider, so I can’t know for an absolute certainty that I was bitten by a black widow (some people report false widows can cause similar symptoms if they inject you with enough venom). But false widows don’t live anywhere even remotely close to where I live, and black widows are both known to live here and we’ve seen them here before. The symptoms certainly aren’t anything remotely close to a brown recluse bite, and while I am not a medical professional, they seem to match the symptoms of black widow bites very, very well. So even if by some chance this wasn’t a black widow, whatever bit me had just as bad of an effect on me as a black widow would have.
For two, why didn’t I go to a hospital? Number one, everything I looked up said the most they could do is give you antivenom (which can cause anaphylaxis, no thank you), or painkillers like fentanyl (which I don’t want anywhere near me, I’d rather feel like I’m dying from a spider bite than take a narcotic painkiller, thanks anyway). Number two, last time a family member had to go to the hospital, the ambulance just about killed him trying to get him there in the first place. I lost most of my respect for my city’s medical facilities that day; if I’m not literally dying, I don’t need a hospital, and if I am dying, my hospitals will probably just kill me off quicker.
I’m currently on day 4 of recovery (including the day I was bitten). I’m still lightheaded, but I can stand without passing out finally. The kidney pain went away, as did the stabbing pain in the bite area (though it still aches a bit, and hurts if you poke it). The fever is mostly gone, my eyes are working normally again and aren’t constantly trying to superglue themselves closed, and my breathing is mostly fine again. I’m definitely still feeling the effects of the bite, but they aren’t crippling anymore. I’ll probably be able to work from home in the morning (I’d try to do household chores too but my mom would probably have a heart attack since I just about killed myself trying to get out of the bathroom).
Speaking of working from home, it’s half past midnight here, I should be going to bed. Thanks for reading!


 What is OpenRocket?
 Key Features
 Drag-and-Drop Rocket Design
 Accurate Flight Simulations
 Detailed Analysis Tools
 Support for Multistage and Cluster Rockets
 Advanced Stability Calculations
 Education-First Philosophy
 100% Free and Open Source (GPLv3 License)
 Perfect for Classrooms and Competitions
 Cross-Platform and Easy to Use
 Join a Global Community
 Ready for Liftoff?
 What Is Digital?
 Key Features
 Real-Time Simulation
 Modular Design
 Clocked Components
 Built-in CPU & Assembler
 Made for Education
 Who Is It For?
 Final Thoughts


 Clean output (only the AI response, no JSON clutter)
 Natural language queries
 Uses free Mistral model by default
 Stateless design – each query is independent (no conversation history)


 KDE Mascot


 Xubuntu 25.04, featuring the latest updates from Xfce 4.20 and GNOME 48.

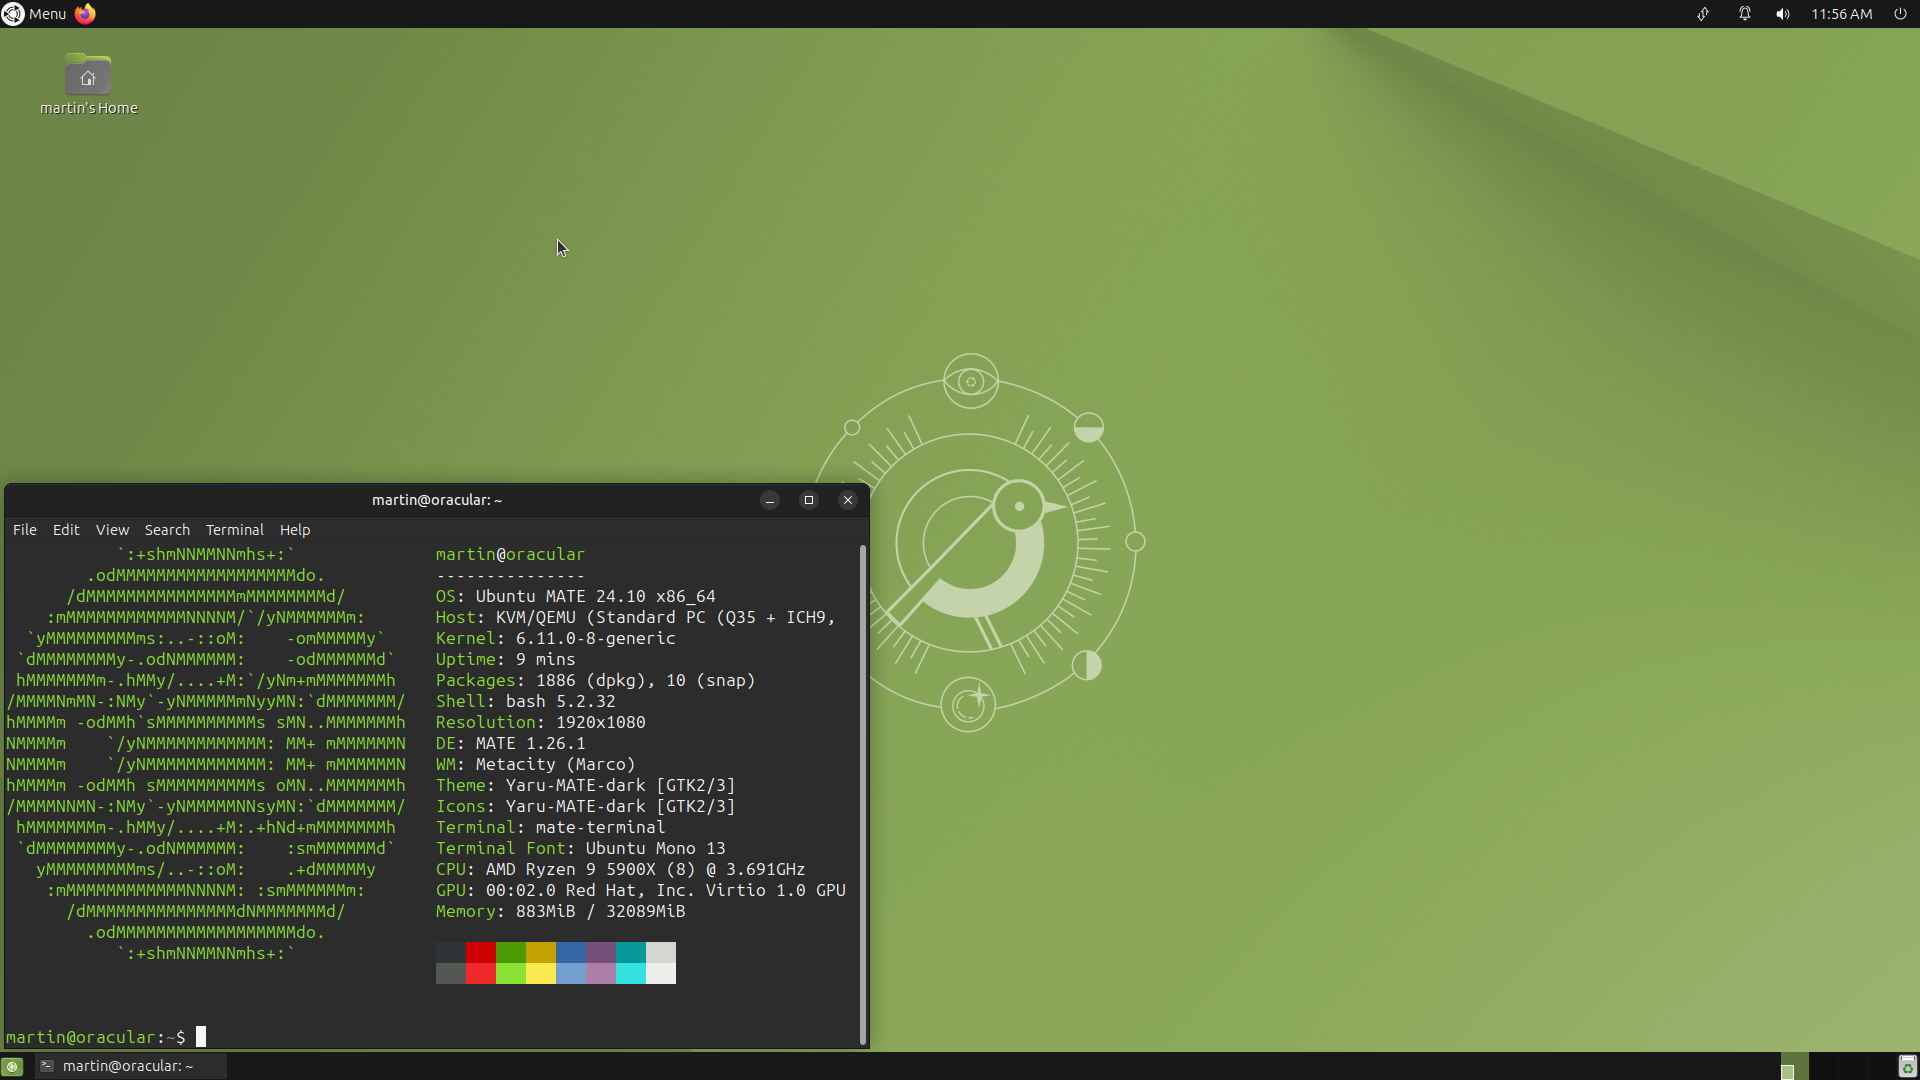 Ubuntu MATE 24.10
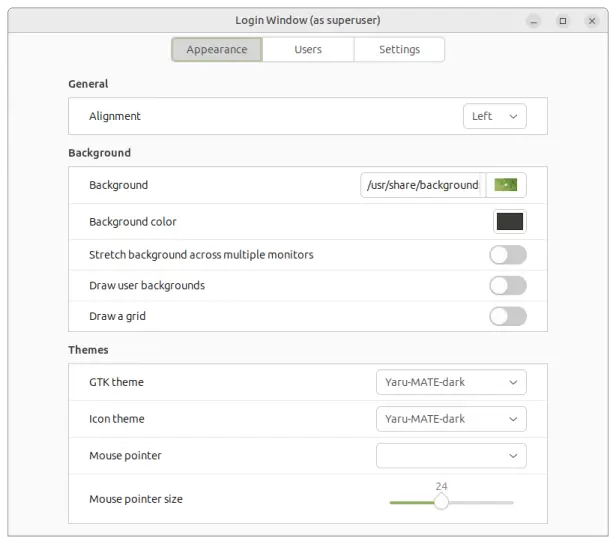 Login Window